
Setting up your Lilypad Front End
Full tutorial: How to create a feeless front end for a Lilypad module.

I am a futurist, reverse engineering the products and services of tomorrow today. Turning visions into projects, projects into milestones, and milestones into tasks providing software development teams with roadmaps to the future. Nine years of experience gathering requirements, rapid prototyping, managing, and coordinating cross-functional teams in both start-up and global operations. Boundless curiosity has led to work with organizations focused on blockchains, gaming, consulting, augmented reality, finance, politics, and language learning. Intent on bridging the gap between the future and today, confronting any challenge that gets in the way.
Quick Links
Code: https://github.com/Lilypad-Tech/lilypad-front-end
What We'll Do
In this tutorial, we will review how to create a feeless front end for a Lilypad module. To do so, we will
Create a new Next JS project.
Create a CLI Wrapper to run the module.
Create a server to handle requests from the browser.
Create our user interface to allow a user to enter a prompt to run the module.
Run the front end
Install Next JS
Create a new Next JS project by running the following:
npx create-next-app@latest
Prepare your CLI Wrapper
In your project folder, create a new file named .env to manage your environment variables. Paste in the following, and replace “<your-private-key-here>” with the private key of the wallet that will be charged for all of the jobs.
WEB3_PRIVATE_KEY=<your-private-key-here>
To avoid publishing your private key online, add .env to your .gitignore file.
Install dotenv to access your environment variables.
npm install dotenv
In your app folder, create a folder for pages, then a folder for API, and in that folder, create a file named cliWrapper.js. Paste the following code into cliWrapper.js.
// Dotenv will allow us to access our environment variables so we can access our private key.
require('dotenv').config({ path: __dirname + '/../../../.env' });
// This will allow us to run code in our CLI.
const { exec } = require('child_process');

// The function we will call on the front end, to run a lilypad job.
function runCliCommand(userInput, callback) {
    console.log("Lilypad Starting...");
    // Ensure the WEB3_PRIVATE_KEY environment variable is set
    const web3PrivateKey = process.env.WEB3_PRIVATE_KEY;
    // If the private key was not set up properly, we should expect to see this error.
    if (!web3PrivateKey) {
        console.error('WEB3_PRIVATE_KEY is not set in the environment variables.');
        return;
    }

    // This command will first export our private key, and then run the Lilypad SDXL module with the prompt provided by the user.
    const command = `export WEB3_PRIVATE_KEY=${web3PrivateKey} && lilypad run sdxl:v0.9-lilypad1 -i PromptEnv="PROMPT=${userInput}"`;

    // This is a callback function to handle any errors when calling runCliCommand function.
    exec(command, async (error, stdout, stderr) => {
        if (error) {
            console.error(`Error: ${error.message}`);
            return callback(error);
        }
        if (stderr) {
            console.error(`Stderr: ${stderr}`);
            return callback(stderr);
        }

        // When Lilypad runs successfully, it returns the relative path to the files it generated, and the IPFS url. Here we are grabbing the relative path in local storage to serve the image to our front end.
        const lines = stdout.trim().split('\n');
        const path = lines[lines.length - 4].trim(); // Trim any extra whitespace
        const filePath = path.replace('open ', '') + '/outputs/image-42.png';

        // This console log will confirm that Lilypad ran successfully.
        console.log(stdout)

        // This will return our output to the front end.
        if (callback) {
            callback(null, filePath);
        }
    });
}

module.exports = { runCliCommand };
Prepare your server
Install Express
npm install express
Install CORS
npm install cors
In your app folder, create a file named server.js and paste the following code:
// Express is a framework for APIs.
const express = require('express');
// Cors will allow our browser to interact with our command line.
const cors = require('cors');
// Here we are importing our cli wrapper we just created
const { runCliCommand } = require('./pages/api/cliWrapper');
// Create an instance of Express to set up the server
const app = express();
// Define the port number on which the server will listen
const port = 3001;

// Enable CORS middleware to handle cross-origin requests
app.use(cors());
// Use express.json middleware to parse JSON requests
app.use(express.json());
// Use express.urlencoded middleware to handle URL-encoded data (useful for form submissions)
app.use(express.urlencoded({ extended: true }));

// Here we will serve images from the directory Lilypad saves files to/
app.use('/images', express.static('/tmp/lilypad/data/downloaded-files'));

// When a user submits their prompt, this will run our CLI Wrapper with their prompt.
app.post('/api/cliWrapper', (req, res) => {
    // Grab the user's input
    const userInput = req.body.userInput;
    // Run our CLI Wrapper with their input
    runCliCommand(userInput, (error, filePath) => {
        if (error) {
            return res.status(500).send('Error processing command');
        }
        // Convert file path to URL
        const urlPath = filePath.replace('/tmp/lilypad/data/downloaded-files', '');
        // Send the URL where the result can be accessed
        res.send(`http://localhost:${port}/images${urlPath}`);
    });
});

// Start the server and listen on the specified port
app.listen(port, () => {
    console.log(`Server listening at http://localhost:${port}`);
});
Prepare your front end
In the App folder, delete the default content on the Page.tsx file and paste in the following code:
"use client";
import React, { useState, FormEvent } from 'react';
import Image from 'next/image';

export default function Home(): JSX.Element {
  // State for storing the user's input
  const [userInput, setUserInput] = useState<string>('');

  // State for storing the URL of the generated image
  const [output, setOutput] = useState<string>('');

  // State to track loading status
  const [isLoading, setIsLoading] = useState<boolean>(false);

  // Function to handle the form submission
  const handleSubmit = async (event: FormEvent<HTMLFormElement>): Promise<void> => {
      event.preventDefault();
      setIsLoading(true); // Start loading
      try {
          const response = await fetch('http://localhost:3001/api/cliWrapper', {
              method: 'POST',
              headers: {
                  'Content-Type': 'application/json',
              },
              body: JSON.stringify({ userInput }),
          });
          const imageURL = await response.text();
          setOutput(imageURL);
      } catch (error) {
          console.error('Error:', error);
      }
      setIsLoading(false); // End loading
  };

  return (
    <main>
        <div className="flex min-h-screen flex-col items-center p-24">
            <div className="z-10 max-w-5xl w-full flex flex-col items-center justify-center font-mono text-sm space-y-4">
                <h1>Lilypad Image Generator</h1>
                <div className="w-[500px] flex flex-col items-center"> {/* Container for image and form */}
                    {/* Placeholder or Loading Animation */}
                    {!output && (
                        <div className="border-dashed border-2 border-gray-300 w-full h-[500px] flex items-center justify-center">
                            {isLoading ? (
                                <span className="text-gray-500">Loading...</span> // Replace with your loading animation
                            ) : (
                                <span className="text-gray-500">Image will appear here</span>
                            )}
                        </div>
                    )}
                    {/* Display the generated image if the output URL is available */}
                    {output && <Image src={output} alt="Generated" width={500} height={500} />}
                    <form onSubmit={handleSubmit} className="w-full mt-2">
                        {/* Textarea for user input */}
                        <textarea
                            className="w-full p-2"
                            value={userInput}
                            onChange={(e) => setUserInput(e.target.value)}
                            placeholder="Enter your prompt"
                            rows={4}
                        />
                        <div className="w-full flex justify-end">
                            {/* Submit button for the form */}
                            <button type="submit" className="mt-4">Submit</button>
                        </div>
                    </form>
                </div>
            </div>
        </div>
    </main>

  );
}
Running your front end
To run your front end on your local host, you will need to update the next.config.js file. Open the file and paste the following:
/** @type {import('next').NextConfig} */
const nextConfig = {
    images: {
      domains: ['localhost'],
    },
  }

module.exports = nextConfig;
Now you're ready to test your front end!
Open two terminals, one to run your server and another to run your front end. In both terminals, navigate to your App folder. For your server terminal, run the following:
node server.js
You should see “Server listening at http://localhost:3001”.
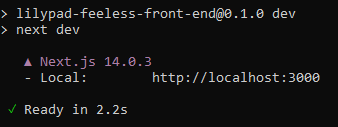
In your second terminal, run your front end with the following command:
npm run dev
You should see something like this.
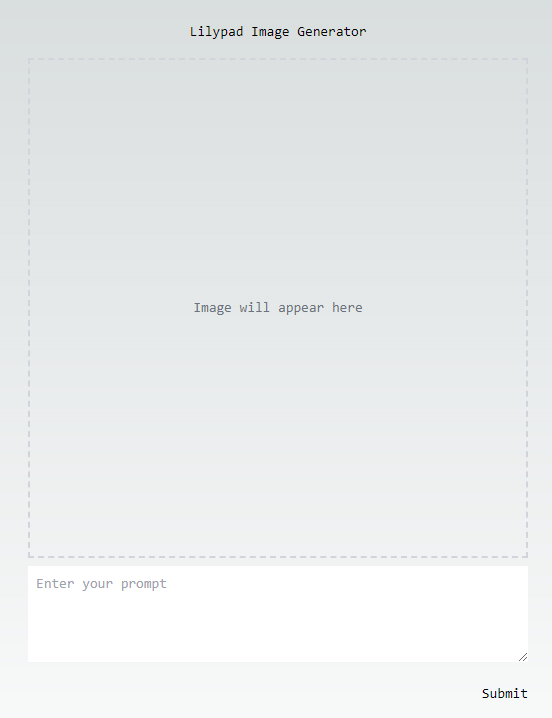
In your browser, navigate to http://localhost:3000/ and you should now be able to see your front end. It should look like this.
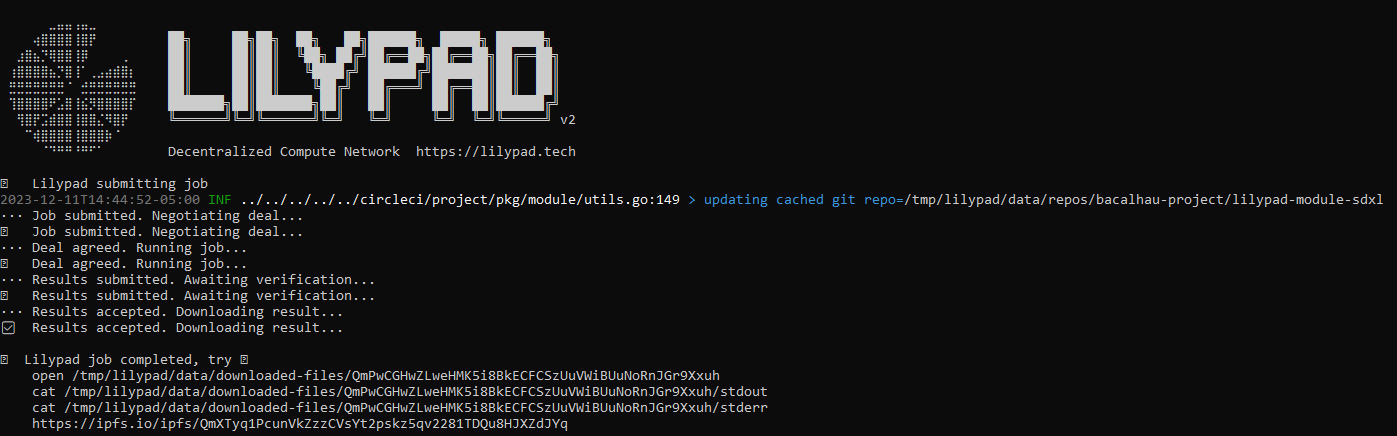
Type in a prompt and click on the enter button. If you look at the terminal running your server, you’ll notice that it says “Lilypad Starting…”. Lilypad will print to the console once the job is complete, and it should look something like this.
Now check your browser, and you should see your image.
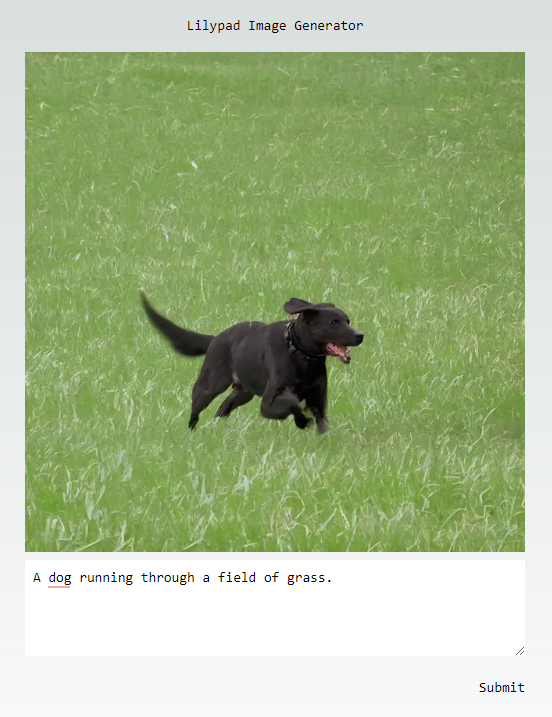
Congrats! You have successfully integrated Lilypad into your front end.
Share your custom front ends with us!
If you were able to complete the tutorial, share your front end with us on Twitter!
If you need any help or have any feedback, hop into our Slack channel.
Want to learn more about Lilypad? Visit the docs here.


